When choosing a media manager, there are a lot of options nowadays. In the past, we covered Plex Media Server which is a great application to manage and stream your media to any compatible device. I also showed you how you can setup Plex Server with Raspberry Pi 3. We also covered Emby, which is a good alternative to Plex offering a similar pack of features. Before you start working on your Raspberry Pi Emby Media Server, make sure your read our Plex vs Emby comparison to choose the best service to sooth your needs. Today I will show you how you can setup Emby Server with Raspberry Pi 3.
Table of Contents
Raspberry Pi Emby Server with Diet Pi OS
Before starting to setup Emby Server with Raspberry Pi 3, we first need to install an operating system. DietPi is one of the lightest operating systems available to date made specifically for low powered devices like the Raspberry Pi and Odroid. It has optimized software installers compiled specifically for the Raspberry Pi 3 that automate the install process, making the setup a simple process.
Before proceeding, you must follow and complete the Raspberry Pi 3 Diet Pi installation guide.
Best Android TV Boxes:
- NVIDIA SHIELD TV Pro Home Media Server - $199.99
- Amazon Fire TV Streaming Media Player - $89.99
- WeTek Play 2 Hybrid Media Center - $134.00
- Kukele Octacore Android TV Box - $179.99
- U2C Android TV Box - $95.99
Next, connect the power cable to the Raspberrry Pi and the DietPi boot process will begin which takes about 2 minutes. Now all you need to do is wait for DietPi to display the IP where you can connect via SSH. You are now ready to setup your Raspberry Pi Emby Media Server.
Connect to your Raspberry Pi 3 via SSH
Connecting to your Raspberry Pi 3 via SSH is really easy. You just need to use a SSH Client and enter the IP of the SSH device you want to connect to.
First, make sure you download Putty on your computer and open it. [Read: 10 best SSH Clients for Windows: free alternatives to PuTTY]
Next, type the IP for your device, the port (22 is the default port for SSH), and select SSH, then click on the Open button to start the connection.
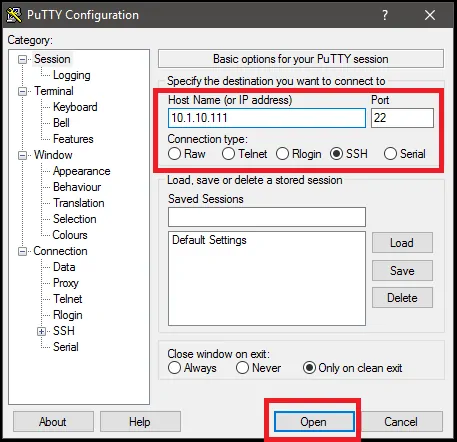
A link to the Raspberry Pi will be made and the Login prompt will appear. For DietPi the default username is root and the password is dietpi.

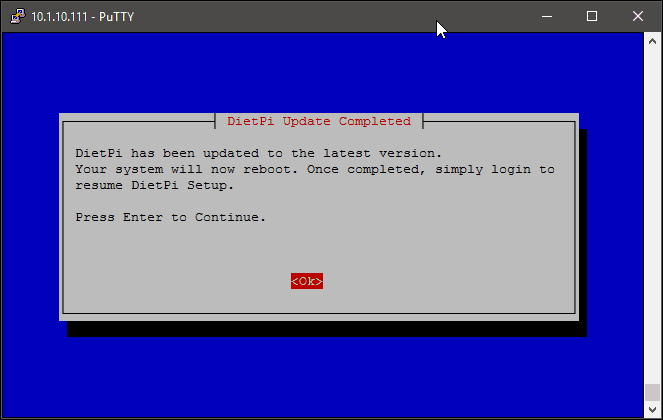
If the credentials used are correct, DietPi will start it's automatic update process, to make sure you are using the latest version. This process usually takes about 5 minutes, so wait patiently until you get the confirmation that the update has been completed then press enter to reboot the device.
Setup Emby Server with Raspberry Pi
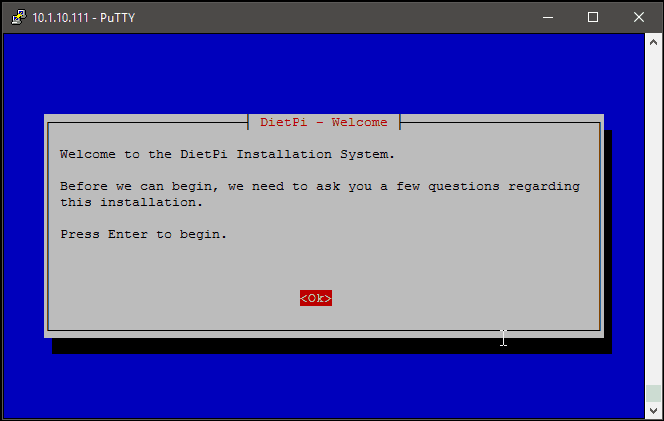
Now that everything is prepared, we are ready to install our Raspberry Pi Emby Media Server. The DietPi Installation System will start automatically, so just press Enter to begin.
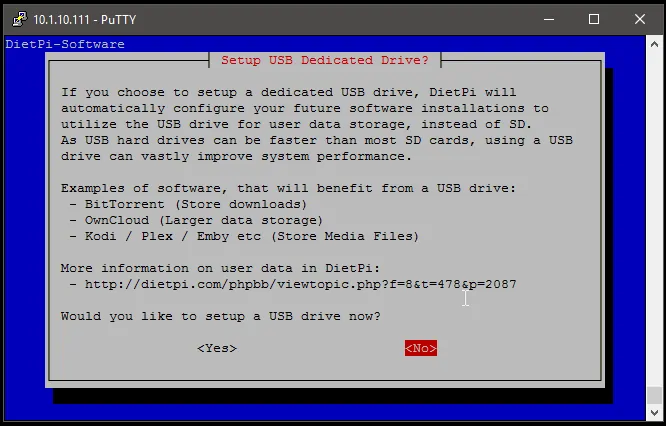
Next, choose if you want to setup a USB drive now or not. As the image shows, USB drive gives a better performance and generally more storage space than a SD card. We have separate guide on how to setup USB drive for storage on Diet Pi. Therefore, we will choose NO, with the assumption that you have already setup a USB drive following that. If not, select YES and setup the USB drive as described in the above guide. You may also select NO to use SD card for storage (not recommended).
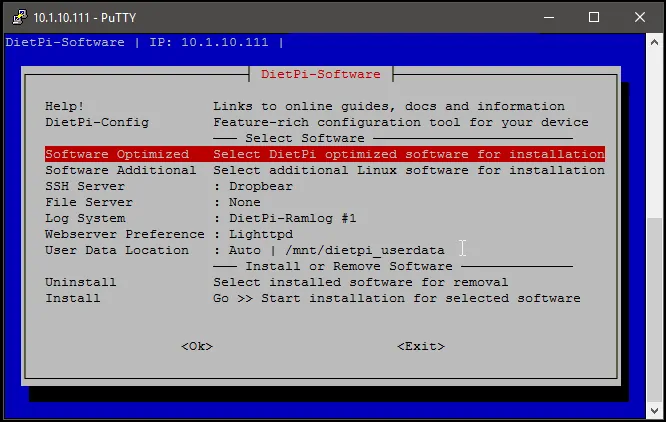
On the next screen, press Enter to start the DietPi Software menu. Select the Software Optimized row then press Enter.
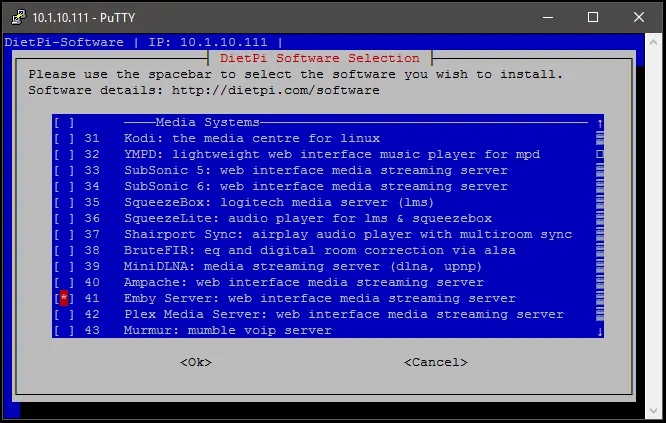
Navigate down to find Emby Media Server. Select it by pressing the Space button on your keyboard, then press Enter to go back on the main menu.
Surfshark VPN Exclusive Offer - 82% off ($2.39/month):
♦ Hide your browsing (no logs), Anonymize Streaming and Downloads
♦ Wireguard Protocol support for VPN.
♦ Circumvent Geo/Country Restrictions and access worldwide content
♦ Works on Windows, Mac, Linux, Android, iOS, Router, and more
♦ 1 TB Encrypted Storage
♦ Money back guarantee - Sign Up Now
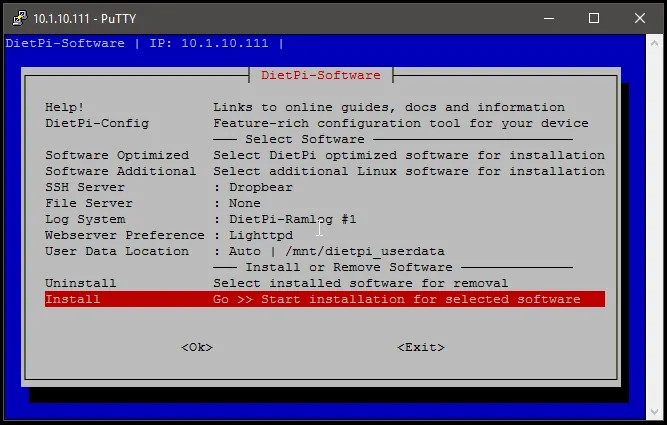
Next, select the Install option to start the setup process.
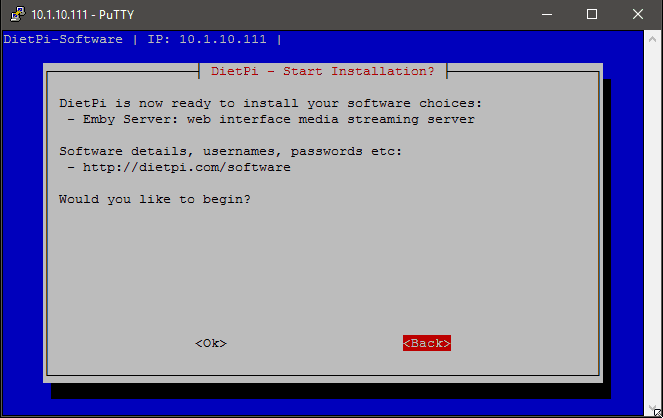
Check the list that contains the software ready to install and confirm it by selecting OK, then press Enter.
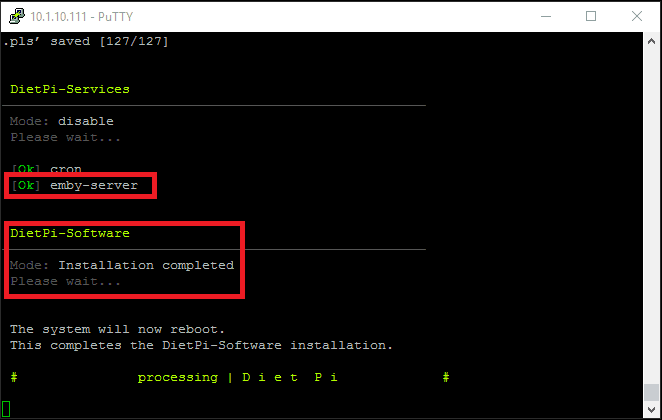
Raspberry Pi Emby Server setup process should begin. All you have to do now is wait for about 10 minutes until you get the Installation Completed message, and the system reboots.
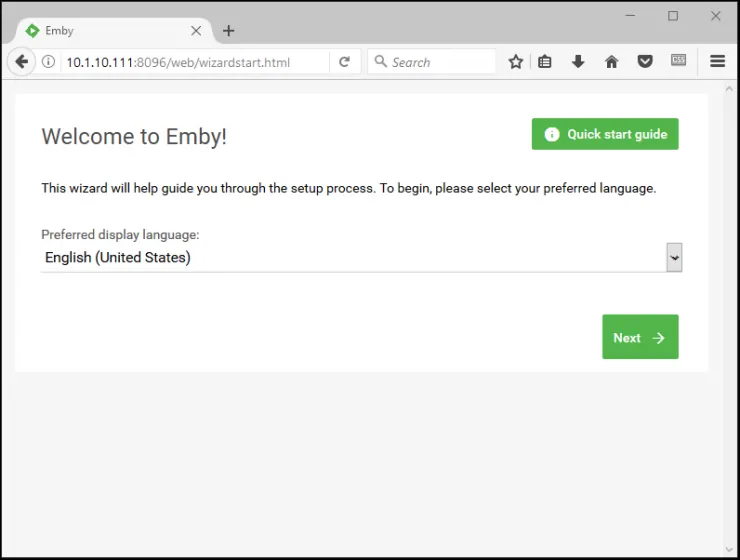
After the system reboots, open your browser and enter the IP of the Raspberry Pi and use port 8096 to in order to start the Emby Setup Wizard. In my case, the IP for the Emby Media Server installation is 10.1.10.111:8096.
Raspberry Pi Emby Media Server in now installed. What do do next?
Congratulations! You managed to setup Emby Server with Raspberry Pi 3 and you now have a dedicated Raspberry Pi Emby Media Server. Next, make sure you check our guide on how to setup Sickrage with Raspberry Pi, in order to automatically populate your Emby Server with new media for your watching pleasure In our future articles, we will show you how you can setup other services next to your Raspberry Pi Emby Media Server, so make sure to check back soon for more.

![10 Best Plex Client Devices [2022] - STUTTER-free Streaming Best Plex Client Devices](https://www.smarthomebeginner.com/images/2022/02/best-nas-for-plex-server-featured-images-from-pexels-photography-maghradze-ph-3764958-e1648542743772.jpg)
![10 Best Jellyfin Client Devices [2022] - 4k, Hardware Transcoding, etc. Jellyfin Roku App](https://www.smarthomebeginner.com/images/2021/02/jellyfin-roku-client-app-ft.jpg)

![15 Best Jellyfin Plugins [2023] - Supercharge your Media Server Jellyfin Intros Plugin Preview Pre-Roll](https://www.smarthomebeginner.com/images/2022/08/jellyfin-intros-preroll-preview.jpg)
![15 Best Plex Alternatives [2022] - FREE and BETTER Options Best Plex Alternatives feature image](https://www.smarthomebeginner.com/images/2022/08/best-plex-alternatives-feature-image.gif)