In my previous articles, I showed you how you can install various services on your Diet Pi installation in just a few minutes. Soon, we will have several guides to setup home server apps on Diet Pi. Using the device SD card for storage is not practical. Therefore, today I will show you how you can use a USB drive for storage on Diet Pi which can easily expand your storage space allowing you to build a capable and low-power server which costs only a few dollars a year to run. This would mean that your Diet Pi server does not have to depend on another network storage devices or a home server for storage. Here is how you can use a USB drive on Diet Pi.
Table of Contents
Setup USB Drive for Storage on Diet Pi
We previously showed you how you can setup Diet Pi on Odroid C2. If you own a Raspberry Pi, you can follow the guide on how to setup Diet Pi on Raspberry Pi 3. You can either setup your USB external drive for storage on Diet Pi during your installation or after Diet Pi installation. This guide guide shows the latter. After installing Diet Pi, follow the guide below to setup USB drive on Diet Pi.
Recommended Media Center Companion Apps:
1. Connect the USB drive to your device
After successfully setting up Diet Pi on your device, you need to connect the USB drive. You can use a wide range of USB devices, from USB memory sticks to USB Hard Drives. If you don't own a USB drive that you can use, make sure you check for a list of compatible USB drives you can use. Please note that if you decide to use a 3.5 inch Hard Drive, you will need to connect additional power to the drive, because the Raspberry Pi or the Odroid C2 will not be able to power it. Besides that, if you are noticing that the USB 2.5 Inch Hard Drive is having issues spinning up, make sure you are using a good quality power supply and cable for your Raspberry Pi or Odroid C2 device.
2. Connect to your device via SSH
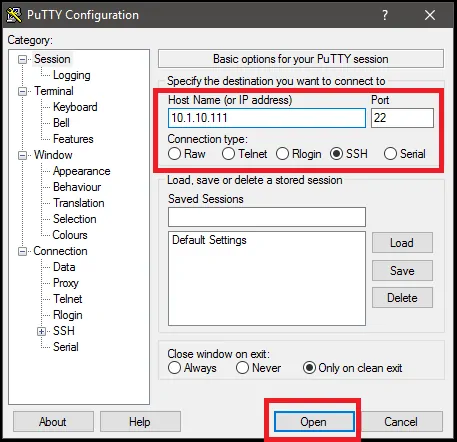
Connecting to your device via SSH is really easy. You just need to use a SSH Client and enter the IP of the SSH device you want to connect to. For this you could use PuTTY or one from our list of SSH Clients for Windows. In this guide, we use PuTTY. First, download Putty on your computer and open it.
Next, type the IP for your Diet Pi device, the port (22 is the default port for SSH), and select SSH, then click on the Open button to start the connection.
A link to your device will be made and the Login prompt will appear. For Diet Pi the default username is root and the password is dietpi.

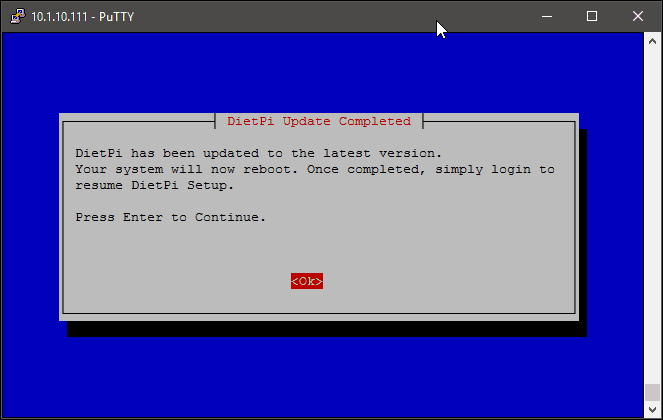
If the credentials used are correct, DietPi will start it's automatic update process, to make sure you are using the latest version. This process usually takes about 5 minutes, so wait patiently until you get the confirmation that the update has been completed then press enter to reboot the device.
3. Configure USB drive for storage on Diet Pi - User Data Location
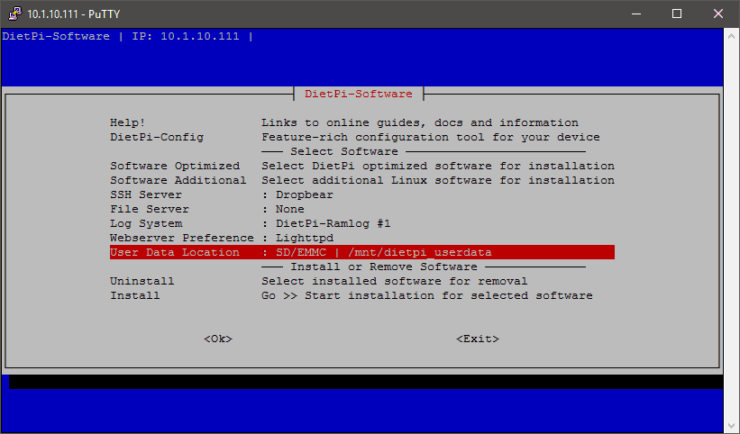
Now that you have the Diet Pi installation ready, and the USB drive connected, we are ready to setup the USB Drive on Diet Pi. On the Diet Pi software screen, select User Data Location.
Next, select List in order to choose your USB Drive on Diet Pi.
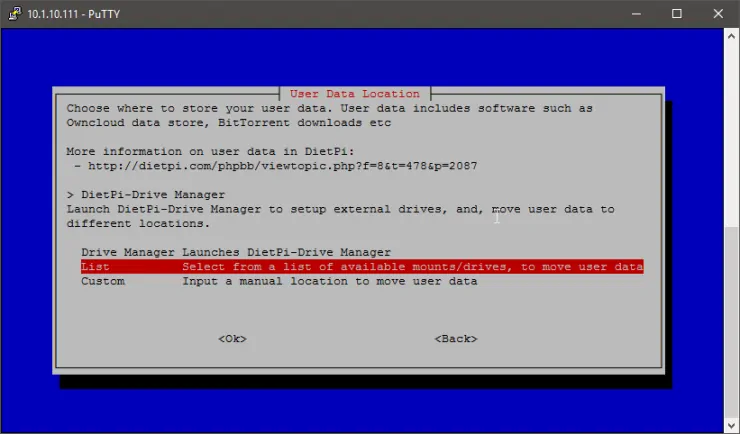
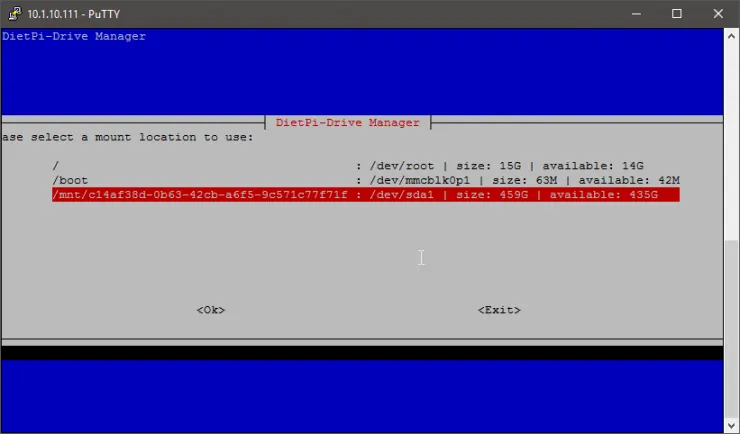
On the next screen you need to select your device. You can easily recognize it by the /mnt/ prefix. In my case, I connected a 500GB USB Hard Drive.
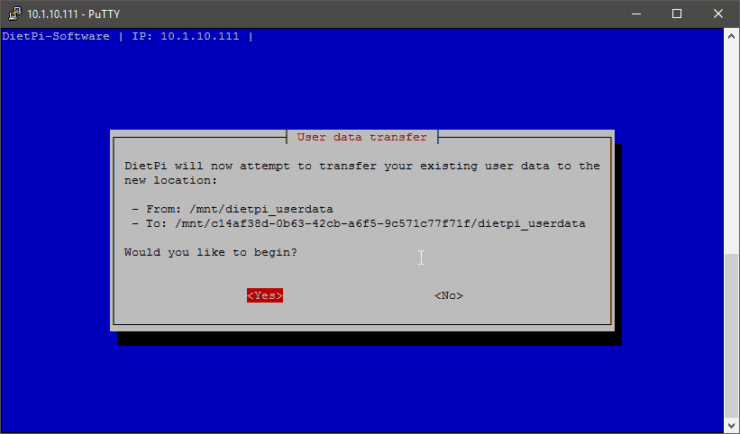
Next, select Yes to confirm that you want to transfer the user data to your external USB drive.
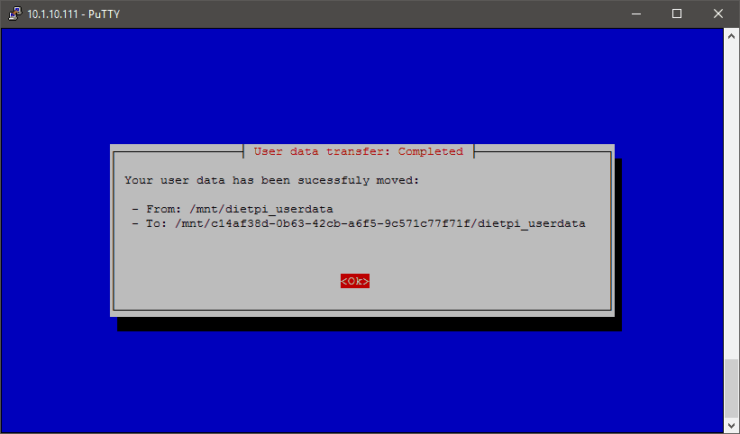
In a few minutes, the notification for the completed user data transfer will be shown. Now, you can enjoy the USB drive for storage on Diet Pi and won't need a separate network storage device or server for storing files you download through your Diet Pi system.
USB drive on Diet Pi is now configured. What to do next ?
Congratulations! The USB drive on Diet Pi is now configured and you can start filling up your drive with data. You can do that by using SickRage for automating your TV Shows downloads. To setup on the same device, you can check our guides on how to setup SickRage Download Server on Odroid C2 or Raspberry Pi 3. More guides coming up soon on setting up a complete home server with Diet Pi, Odroid C2 or Raspberry Pi 3, and these awesome home server apps. So make sure you check them out and start setting up a really low power server.

![5 Best NAS with SSD Cache for Home and Office [2023] A feature image that shows all 5 of the best NAS that supports SSD caching for home and office](https://www.smarthomebeginner.com/images/2023/10/best-nas-with-ssd-cache-feature-image.png)
