Kodi video settings can be a confusing maze of options if you don't know what each thing does; however, if you are aware of the purpose of each setting, you can make your viewing experience more enjoyable and to your liking. If you understand these, as well as the Kodi audio settings, you will be on your way of crafting the perfect HTPC experience, tailored to your needs and, with the help of a customizable interface such as the one offered by the 10 top Kodi skins for tablets, feel each time more comfortable watching your movies and browsing your menus on your HTPC. [Read: 10 best Kodi movies addons in 2015 for your HTPC]

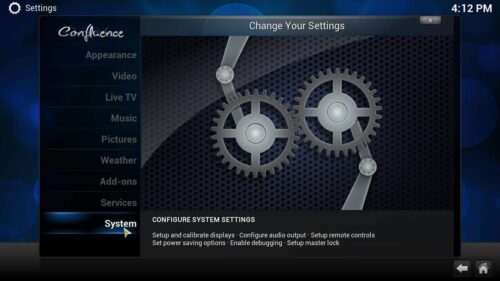
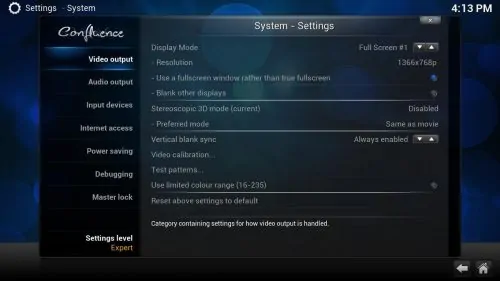
There are automated solutions available to configure properly your Kodi video settings, such as Kodi Configurator for Android; however, most of these settings are automatically configured when you first start Kodi, for a better viewing on your device, which might make a Kodi setup guide for these a bit unnecessary. However, if you still want to tweak them, you can find them under System -> Settings -> System -> Video output. This is specially useful when the hardware you have for your HTPC is on the less powerful end of the media player spectrum; like, for example, some Android media players under 100$, or some kind of TVs/monitors. There are also in-playback video settings, that allow you to modify other aspects of your Kodi experience. By tweaking both of these menus, the main one and the in-playback one, you can find the best settings for Kodi video playback.
Best Android TV Boxes:
- NVIDIA SHIELD TV Pro Home Media Server - $199.99
- Amazon Fire TV Streaming Media Player - $89.99
- WeTek Play 2 Hybrid Media Center - $134.00
- Kukele Octacore Android TV Box - $179.99
- U2C Android TV Box - $95.99
Table of Contents
The Kodi video settings you can modify from the main video settings menu allow you to customize the general experience you have while watching content on Kodi or even while browsing the menus. The in-playback Kodi video settings allow you to tweak the way you watch your current movie or show, and offer you the option of making such settings a default for all other videos. What exactly are these settings that you can modify from each video settings menu? We tell you more about it, in this article:
Kodi video settings: main video settings

- Display mode: allows you to choose between displaying Kodi fullscreen or windowed. Sometimes, the fullscreen setting in the Kodi video options will have a number alongside it; which is specially useful for setups with more than one monitor/screen.
- Resolution: this setting changes the resolution Kodi user interface is displayed in, to better fit your screen and make elements look as detailed as possible and with a correct aspect ratio.
- Use a fullscreen window rather than true fullscreen: if enabled, Kodi will run on a window the size of a screen, instead of using the DirectX fullscreen mode. This setting benefits multi-screen configurations, where Kodi can be used without minimizing other applications in other windows. This setting is mainly designed for Windows OS devices and uses slightly more resources, which might impact playback.
- Blank other displays: In a multi-screen configuration, this setting blacks out other screens besides the one where Kodi is displayed.
- Stereoscopic 3D mode: allows you to choose between several 3D formats for 3D video playback.
- Preferred mode: establishes a 3D preferred mode for 3D playback, with the option to configure it as being the "same as movie".
- Vertical blank sync: this option lets you compensate for horizontal screen tearing, and you can choose between having it disabled, enabled only during movies, or all the time.
- Video calibration: lets you configure the pixel ratio and effective screen size of Kodi, via an interactive on-screen feature, that you can use with a mouse, keyboard or remote while following the on-screen instructions.
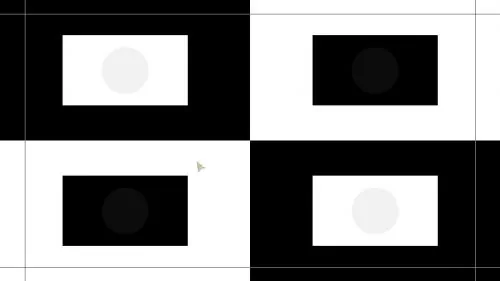
- Test patterns: lets you display several test patterns for further video calibration, which you can browse through by using the directional arrows.

- Use limited color range (16-235): Only recommended if your monitor is a regular HDMI TV, as it prevents PC monitors from displaying proper blacks; this setting limits the color range to be displayed within Kodi.
- Reset above settings to default: This allows you to go back to the default video configuration.
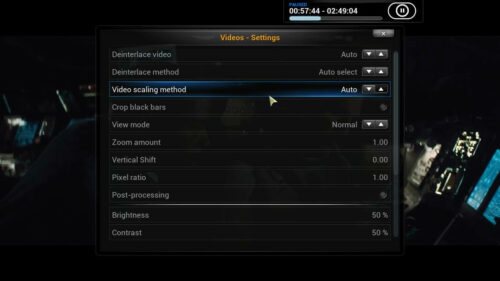
Kodi video settings: in-playback video settings.

- Deinterlace video, Deinterlace method: This allows you to configure deinterlacing, to decide whether it should be on, off, or automatically set; as well as the method to use for this process, which can also be set to be auto-selected.
- Video scaling method: by scaling the video, Kodi can make the image match the video output device resolution. There are many methods to achieve this and you can choose among them with this option; however, all of these methods are non-adaptive, meaning they will produce different amounts of aliasing and blurring, so it's up to you which one of these Kodi video settings for scaling to use.
- Crop black bars: sometimes, black bars will be encoded in your video and cause issues with its aspect ratio. This setting allows you to crop those black bars in order to fix those issues.
- View mode: choose between different kinds of screen zooming and screen stretching. Useful to make a movie fit within the screen area for better viewing.
- Zoom amount, Vertical shift, Pixel ratio: these options let you adjust zoom and aspect ratio, as well as help you properly setup the image on viewing devices such as projectors.
- Post-processing: reduces low pixellation and macroblocking on videos with low resolution or low bitrate.
- Brightness, Contrast: these allow you to adjust the video brightness and contrast for a better viewing.
- [VDPAU] Noise reduction, [VDPAU] Sharpness: These allow you to set the levels of noise and sharpness if you're using VDPAU. If you are not using it (which you probably aren't if your OS is not Unix-like, this is, Linux, FreeBSD, Solaris and others), then these options will not be visible to you.
- Non-linear stretch: Stretch the video to fill the screen, preserving the center without stretching.
- Stereoscopic 3D mode of video, Invert stereoscopic 3D mode (flip eyes): These settings allow you to control how 3D video is displayed, and whether or not the 3D sides are inverted (for side by side view, for example).
- Set as default for all videos: you can force all videos to run under these settings by clicking here.
- Video calibration...: brings up the same video calibration screen as the option in the main video settings.
There are so many Kodi video settings!
Yes, that's right; however, by having so many Kodi video settings, it's easy to configure and tailor your Kodi experience better, in a way that you will like and enjoy. This is very important, specially with so many content options such as the 10 best IPTV addons for Kodi, and surely helps having a comfortable viewing experience. With the knowledge of these and other settings, proper content and appropriate ways to control your HTPC, such as a wireless HTPC keyboard or apps such as Kore, the official XBMC/Kodi remote, you are sure to have a great and relaxing time in your living room.


![15 Best Jellyfin Plugins [2023] - Supercharge your Media Server Jellyfin Intros Plugin Preview Pre-Roll](https://www.smarthomebeginner.com/images/2022/08/jellyfin-intros-preroll-preview.jpg)


![10 Best Plex Client Devices [2022] - STUTTER-free Streaming Best Plex Client Devices](https://www.smarthomebeginner.com/images/2022/02/best-nas-for-plex-server-featured-images-from-pexels-photography-maghradze-ph-3764958-e1648542743772.jpg)
![15 Best Plex Alternatives [2022] - FREE and BETTER Options Best Plex Alternatives feature image](https://www.smarthomebeginner.com/images/2022/08/best-plex-alternatives-feature-image.gif)
![10 Best Jellyfin Client Devices [2022] - 4k, Hardware Transcoding, etc. Jellyfin Roku App](https://www.smarthomebeginner.com/images/2021/02/jellyfin-roku-client-app-ft.jpg)