In June 2019, I upgraded the UPS connected to my Ubiquiti Network gear and Synology NAS from APC Back-UPS NS700MC to CyberPower CP1500PFCLCD. You can ready about my complete smart home setup here. Synology DiskStation Manager already has a way to monitor the UPS status and initiate a shutdown when the battery is critically low. Home Assistant is my smart home hub and I try to monitor almost everything through it. So, recently I successfully configure NUT sensor on Home Assistant to monitor the UPS connected to Synology NAS on my HASS.io.
An Uninterruptible Power Supply (UPS) prevents data loss or hardware failure in case of a power failure. My Ubiquiti Network gear and Synology NAS are not only critical for my smart home setup, but they are also some of the most expensive gadgets I have in my home.
Table of Contents
Requirements
In order to successfully follow and implement this guide, you need the following:
- Home Assistant - In my case HASS.io runs in Docker on Linux Mint 19 on my Intel NUC8 home server.
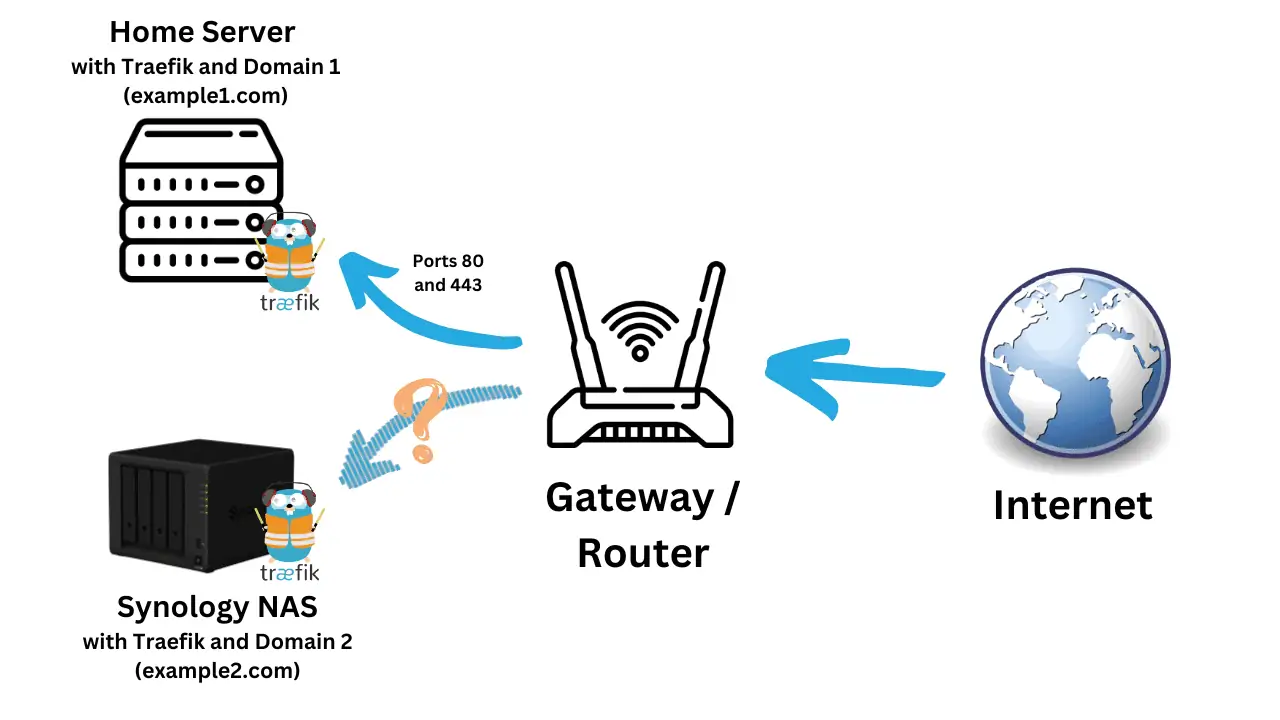
- Synology NAS - You may even have Home Assistant running in docker on Synology. I do not recommend using Docker on Synology because it is an old version. Yes, it is there and Synology advertises it as a feature but unfortunately, the older version is quite outdated and cannot take advantage of the new and important Docker features.
- A Modern UPS - Most UPSes made in the last 10 years that are able to provide status output through a USB cable should work. In this guide, I am monitoring my CyberPowder CP1500PFCLCD UPS on Home Assistant. Monitoring is slightly different for APC UPSes.
What is NUT?
NUT (or Network UPS Tools), is a project that aims at supporting power devices such as Uninterruptible power supplies, power distribution units, automatic transfer switches, power supply units, and solar controllers. It provides a way to control and monitor these devices using a uniform control and management interface, including an automatic shutdown of devices when the battery is running low. At this point, over 140 different manufacturers and several thousand models are compatible with NUT. NUT is open source and free to use. A similar option for APC UPSes is the apcupsd, which is also open-source.
Synology has implemented NUT to manage UPSes. Configuring UPSes can be done through Control Panel -> Hardware and Power -> UPS. However, the options availabe through the DSM web interface are quite limited (but sufficient for typical usage), as you can see below.
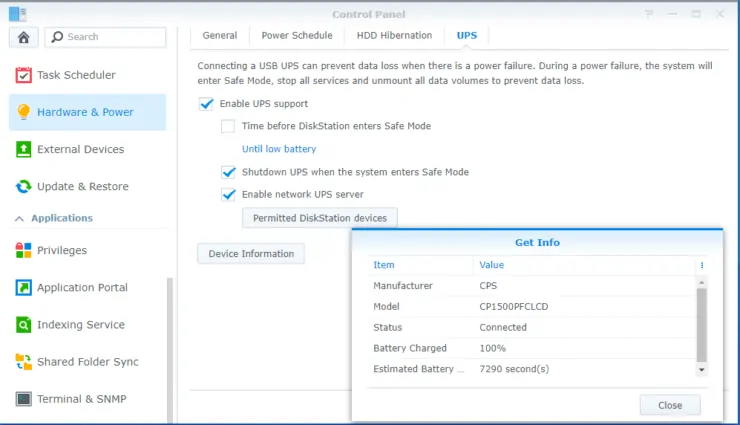
You can edit the NUT UPS configuration files using commandline and a lot more options become available via this method. But we are not going to do much with commandline in this guide.
Monitor UPS Connected to Synology NAS on Home Assistant
In this guide, I am using HASS.io on Docker, but you can use pretty much variant of Home Assistant. Having said that, there is an easier way to accomplish this on HASS.io using the NUT Addon. Why I do not use the addon myself, having this flexibility is another reason I moved from HOme Assistant on Docker to running HASS.io on Docker. In this guide, we are going to do it the harder way, which is not really hard.
1. Enable UPS on Synology DSM
First, if you have not already done so, open DSM web interface and go to Control Panel -> Hardware and Power -> UPS. Enable UPS support as shown in the picture above. You may choose to initiate shutdown after a set time or when battery is critically low. This is entirely up to your preference. [Read: How to add an animated Weather Radar on Home Assistant?]
If UPS is connected properly and recognized by your NAS, you should see something similar to the screenshot below, when you click the Device Information button.
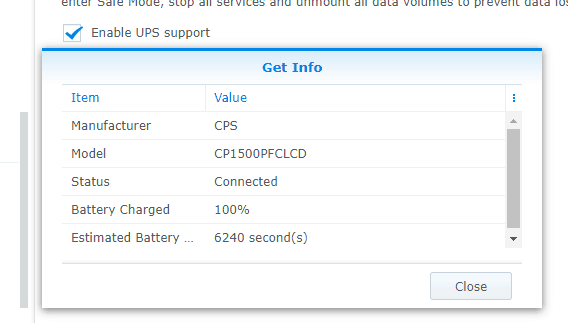
In addition, check Enable Network UPS server. This is needed for you to be able to read NUT information from other systems using NUT clients.
2. Permit Other Devices to Monitor NUT
Once UPS is running, you will need to give access to other systems in your network to be able to monitor NUT server. To do this, click on Permitted DiskStation Devices add the LAN IP address of the system running Home Assistant, as shown below.
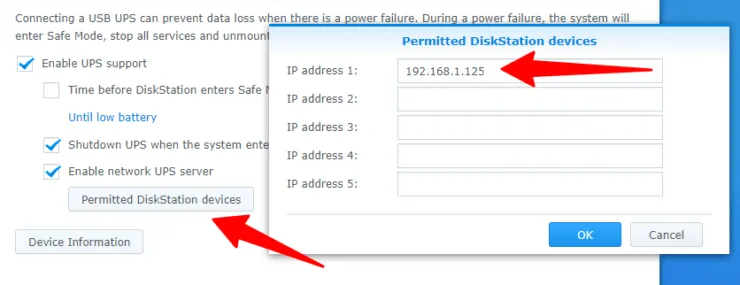
In addition, if your Synology Firewall is enabled then you will have to make NUT server accessible. For this, you will have to allow access to port 3493, which is the default NUT port on all systems. Go to Security -> Firewall, as shown below.
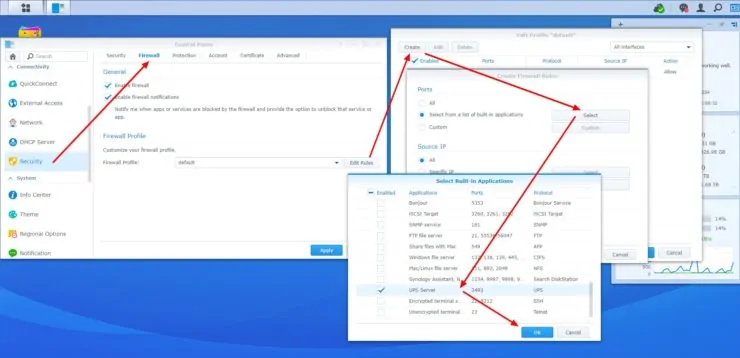
Edit your Firewall profile rules, then create a new rule, and select UPS Server as the built-in application. Then click OK/Apply and exit out of all the windows. Now, your NUT UPS server should be accessible from other machines. [Read: 5 Best Android Apps for Home Assistant – Remote control your home]
3. Check if NUT Server is Functional and Accessible
This step is optional and requires some commandline work. But I recommend that you do this to make sure you do not have any headaches later on. If you prefer to check out the NUT configuration files in Synology, they are located here:
/usr/syno/etc/ups
If you make any changes to the configuration files, be sure to reload the UPS daemon using the following command:
sudo upsd -c reload
For successfully implementing this Home Assistant NUT sensor guide, you do not have to manually edit any of the NUT configuration files. [Read: Configure Google Assistant for Home Assistant: Paid and Free Options]
Check on Synology - localhost
If your Home Assistant is on Synology NAS, then, open terminal on your Synology NAS. For this, you will have to SSH into your Synology NAS. Then check to see if NUT server is listening on port 3493 using the following command:
sudo netstat -tnlp | grep ups
You should see an output like the one below that shows all the different IP addresses that can be used to access the NUT server using port 3493.

For access from NUT sensor on Home Assistant, we are going to use the LAN IP and Port: 192.168.1.254:3493.
Additionally, you can also use the following command to check the status of the UPS, including battery level, runtime remaining, etc.
upsc ups@localhost
Note that this only works for the default NUT configuration in Synology. If you changed any of the NUT configuration parameters, you will have to modify the above command appropriately, especially the name ups.
Check from Another System
If your Home Assistant runs on another system (remote system), as in my case, then here is how you can test connectivity to your NUT server. Use the command nc -zv LAN-IP 3493 (replace LAN-IP) and you should see an output like the one below that tells you that the connection succeeded.

You can also use NUT client to check UPS status. Install NUT client on the remote system using the following command:
sudo apt-get install nut-client
Then use the command upsc ups@LAN-IP (replace LAN-IP) and you should be able to see all the UPS stats as shown below.
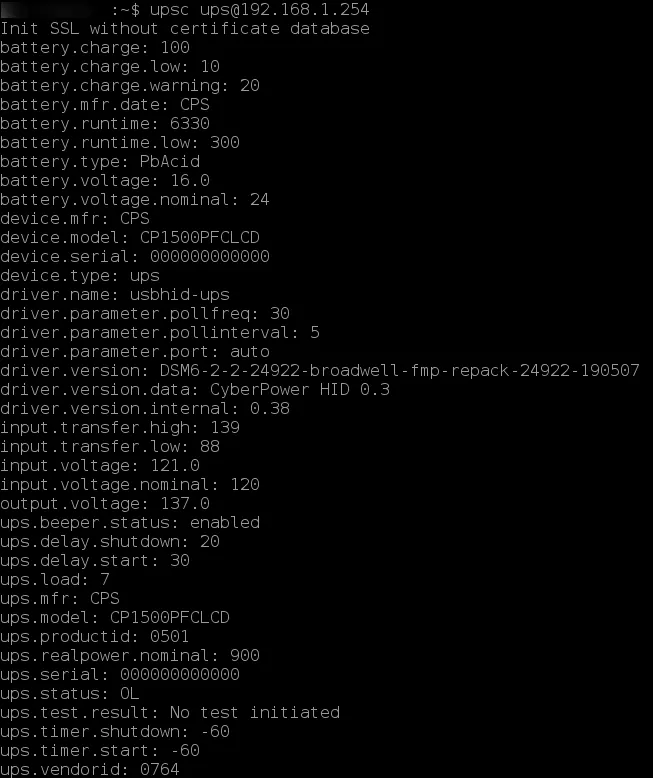
If everything looks good so far, then I do not see any reason why you would have trouble configuring NUT Sensor on Home Assistant to monitor a UPS connected to your Synology Network Attached Storage.
4. Configure NUT Sensor on Home Assistant
To setup NUT sensor on Home Assistant, open your configuration.yaml file and add the following under (exclude sensors: if you already have it):
sensor:
  - platform: nut
    name: CyberPower CP1500PFCLCD
    host: 192.168.1.254
    resources:
      - ups.status.display
      - ups.load
      - input.voltage
      - battery.charge
      - battery.runtime
The 5 resources listed above are the information I find useful in my case. You can add any or all of the resources listed in NUT sensor page.
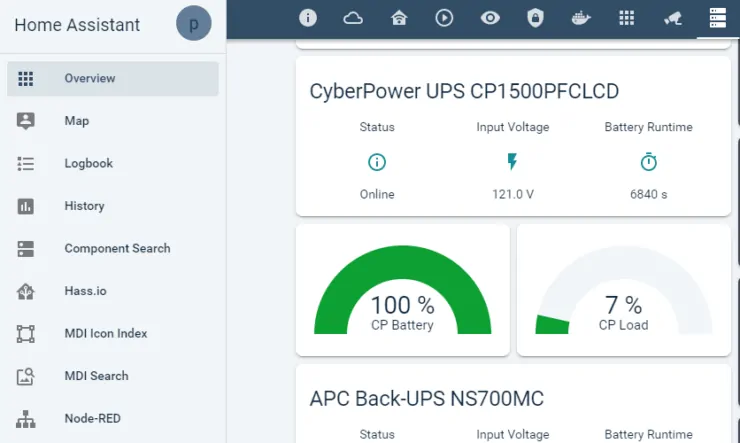
Restart Home Assistant and you should see the above 5 sensors listed under "Unused entities". Then you may use one of the several lovelace UI cards to display these on your Home Assistant interface.
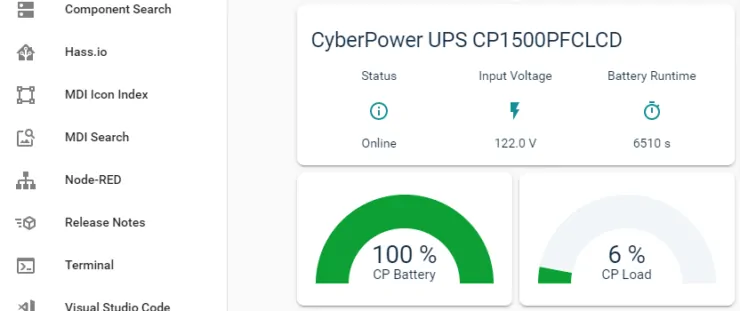
Here is the YAML for the lovelace card shown above:
cards:
  - entities:
      - entity: sensor.cyberpower_cp1500pfclcd_status
        name: Status
      - entity: sensor.cyberpower_cp1500pfclcd_input_voltage
        name: Input Voltage
      - entity: sensor.cyberpower_cp1500pfclcd_battery_runtime
        name: Battery Runtime
    theme: default
    title: CyberPower UPS CP1500PFCLCD
    type: glance
  - cards:
      - entity: sensor.cyberpower_cp1500pfclcd_battery_charge
        max: 100
        min: 0
        name: CP Battery
        severity:
          green: 0
          red: -80
          yellow: -30
        theme: default
        type: gauge
      - entity: sensor.cyberpower_cp1500pfclcd_load
        max: 100
        min: 0
        name: CP Load
        severity:
          green: 0
          red: 90
          yellow: 70
        theme: default
        type: gauge
    type: horizontal-stack
type: vertical-stack
You may customize the Lovelace UI card as you please.
Concluding Remarks
I now have the NUT sensor on Home Assistant to Monitor a UPS connected to Synology NAS. So what? While this is helpful for a quick check of what is going on in your setup, you may also setup automation. For example, I have the following three automation setup on my Home Assistant:
- When there is a power outage (Input Voltage < 1), send me a telegram notification to say that the Power is Off.
- When the power comes back (Input Voltage > 1), send me a telegram notification.
- When the UPS battery level reaches 20% or less, then notify (telegram) me of the upcoming shutdown.
I have these automation setups for both CyberPower and APC UPSes. I am pretty you can do much more than this. Sounds exciting? Go ahead configure NUT sensor on Home Assistant and check on your UPS connected to Synology NAS.

