In this post, I will show you how to install HASS.io on Docker on Ubuntu or Debian systems. I have been running Home Assistant for my home automation needs since December of 2017, which is when I started my home automation journey. Home Assistant is a python based program for smart home automation with integration for over 1000 components. We have previously reviewed the list of best home automation controllers but none of those come close to the flexibility of Home Assistant. Unfortunately, the flexibility also means a steep learning curve for beginners.
June 28, 2020: This method is working again and I am back to using it. However, it is still not an officially supported method and could stop working anytime. I am quite confident that one of the community members will pick it up and keep it going. If you do not like the uncertainty, check my GitHub Repo for home assistant docker-compose example.
June 11, 2020: It appears that Home Assistant folks made quite a few changes over the last few months. First, there is no more HASS.io. The method described here would have fallen under the new "Home Assistant Supervised" name. However, the installation of Home Assistant Supervised in Docker is now an "unofficial" method and will not be supported by Home Assistant folks. Therefore, the have stopped updating removed stopped updating the HASSio install script used/linked in this post. Hopefully, a community member picks it up and keeps it updated.
There are many ways to install Home Assistant. I started out with HASS.io on Raspberry Pi 3, but quickly realized it was too underpowered. Then tried Home Assistant on a Python virtual environment and finally settled on Home Assistant on Docker due to its simplicity/portability. As the title suggests, recently I decided to move from Home Assistant on Docker to HASS.io on Docker on Ubuntu Server for reasons detailed below.
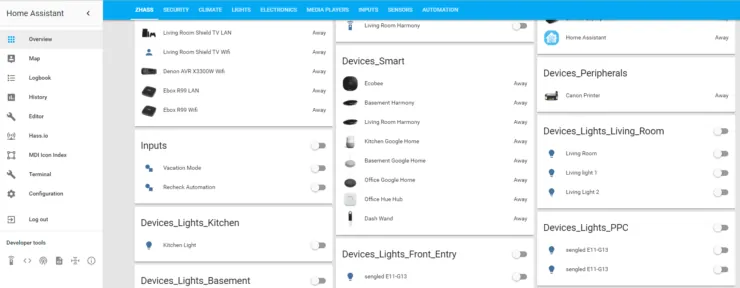
HASS.io on Raspberry Pi is the most common setup. But I wanted the benefits of HASS.io (listed below), without the limitations of Raspberry Pi hardware. I decided to write this guide for people that are in my situation. [Read: What is a smart home and what can smart home automation do for you?]
Table of Contents
Home Assistant vs HASS.io
First, you may ask, I already run Home Assistant or Home Assistant on Docker. Why would I want to move to HASS.io? HASS.io is a more self-contained home assistant setup and is much easier for beginners to install and start. Both Home Assistant and HASS.io are open-source but HASS.io is optimized for embedded devices like Raspberry Pi. They both offer local home automation rather than relying on cloud services.
Here are a few unique advantages of HASS.io:
- Easy updates from within the web interface
- Easy backup and restoration
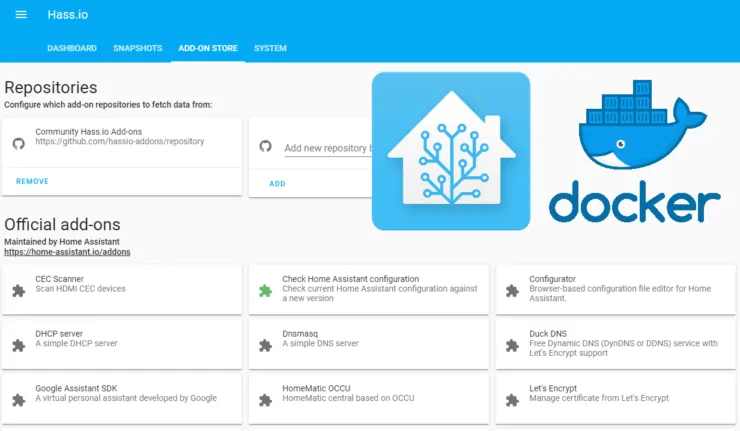
- Numerous official and community addons that extend home assistant's functionality with just few clicks. A standalone install of Home Assistant does not offer addons store.
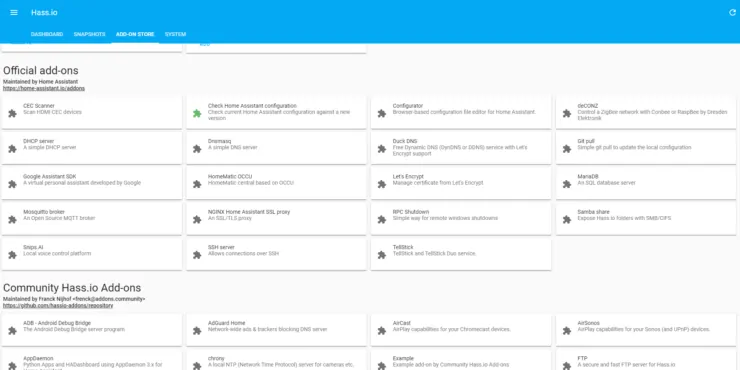
While this might not sound like much to some, imagine having to maintain separate apps or docker containers for all of your home automation needs (eg. Home Assitant, MQTT Broker, NodeRed, LetsEncrypt, Dynamic DNS, and much more). Having literally spent 100s of hours on my Docker Media Server with Traefik Reverse Proxy, I can tell you that over time this can take a lot of effort. In addition, A fully qualified domain name with SSL is needed for voice assistants (eg. Google Assistant) to work with home assistant. [Read: Configure Google Assistant for Home Assistant: Paid and Free Options]
Home Assistant has a tendency to break things during updates (because it is evolving rapidly). If you don't like that, there is an addon for you on HASS.io. It checks if the new version is compatible with your current setup. You can then decide to upgrade or put it off for later depending on your situation.
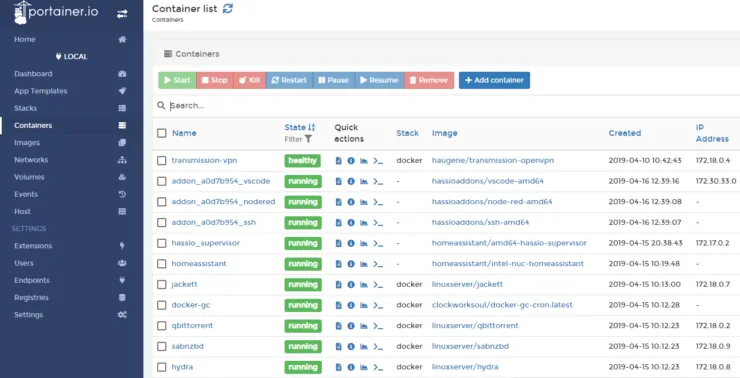
Some might argue that Home Assistant on Docker is better than HASS.io on Docker and that dockerized HASS.io can be quite limiting. To be clear, the limitation is not in home assistant itself but the level of management or direct tinkering that HASS.io allows. If you already know Docker well, almost everything that HASS.io does with addons can be replicated on any host with Docker. But do you want or have the time to do this? In my experience, the majority of users will appreciate the simplified management of all home automation apps using HASS.io addons interface. It will save you a ton of time and you can focus on home automation rather than maintaining your home automation system. Furthermore, with Portainer, which is a web UI for managing docker containers (available as HASS.io addon), you can manage your any HASS.io addon with easy when (rarely) needed.
Still undecided? Checkout this Reddit thread to see what some of the users think.
If you are convinced, then let's move on to see how to install HASS.io on Docker on Linux (Debian/Ubuntu based systems).
| Build an Ultimate Raspberry Pi Smart Home Hub ~$105 | Price |
|---|---|
| Raspberry Pi 3 B+ Starter Kit with case, power adapter, and heat sinks | ~$55.00 |
| Sandisk Ultra 16GB Micro SDHC UHS-I Card 98 MB/s | ~$7.50 |
| Aeotec Z-Stick Gen5, Z-Wave Plus USB to create gateway | ~$45.00 |
Install HASS.io on Docker
There are several ways to install HASS.io, with Raspberry Pi setup being the most common one. But as I said before, pretty soon you will realize that Raspberry Pi is underpowered if your setup grows. Even on my AMD 5350 Ubuntu Server NAS, I found that Home Assistant was running slow. This is the main reason why I switched to a NUC for Home Automation and Docker needs.
In this guide, I will show you how to install HASS.io on Docker on Linux Mint 19. But this should work on any Debian/Ubuntu systems. A little bit of commandline work is required.
Pre-requisites
First, install community edition of Docker, as described in my Docker Media Server guide. Once that is done, install other pre-requisite packages using the following command.
sudo apt-get install bash jq curl avahi-daemon dbus software-properties-common apparmor-utils
Once done, let's move on to installing HASS.io on Docker.
Setup HASS.io on Docker
This is the simple part, home assistant contributors have written a script to simplify HASS.io setup on Docker. While almost any hardware is supported, some hardware (eg. Intel NUC, Odroid, etc.) have optimized home assistant builds. So determine your supported hardware type from the script's GitHub page.
Then run the following commands to setup HASS.io on Docker on Linux:
sudo su
curl -sL https://raw.githubusercontent.com/home-assistant/hassio-installer/master/hassio_install.sh | bash -s -- -m intel-nuc -d /home/user/docker/hassio
Customize:
Anything after -- is optional.
- -m intel-nuc - Replace with your machine type or remove this option.
- -d /home/user/docker/hassio - Optional but I strongly recommend that you list a known path to store HASS.io data. The path listed here is just an example.
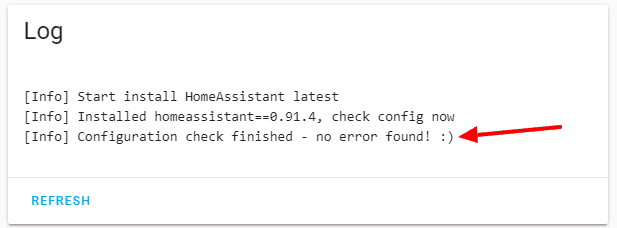
Upon successful execution of the HASS.io Docker installation script, the output should look something similar to the one below.

After giving a few minutes for Home Assistant to start (first time can be slow), visit the following URL:
http://DOCKER-HOST-IP:8123
DOCKER-HOST-IP is the local IP Address of the Linux system running Docker. You should reach Home Assistant's account creation page shown below.
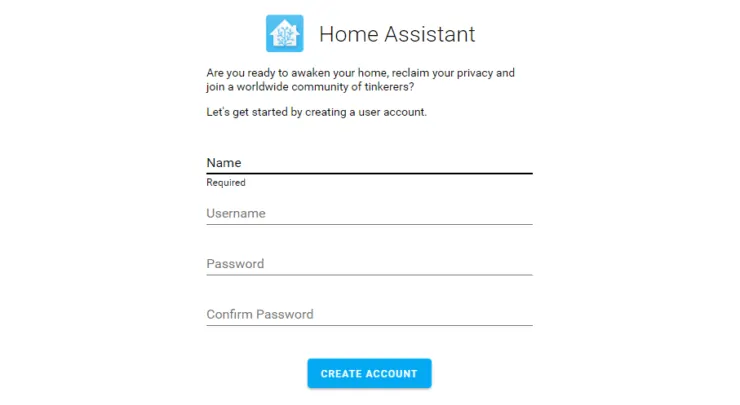
You are now good to proceed with configuring, automating things, and driving people in your home nuts when something stops working.
Move Home Assistant Configuration to HASS.io
What if you already had home assistant running and want to move over those configurations. Sure, you can do that. If you already have Lovelace as the Home Assistant configuration (default configuration post version 0.86) then the move is quite simple. Before proceeding stop both your previous home assistant instance and HASS.io.
Stopping HASS.io can be tricky because HASS.io supervisor will automatically start it. So you will first have to stop HASS.io supervisor using the following command:
sudo systemctl stop hassio-supervisor.service
Then stop Home Assistant form the web interface Configuration->General. Then copy all the contents from Home Assistant configuration folder of your old instance to homeassistant folder within your HASS.io data folder defined previously during installation.
For migrating Zwave devices, make sure zwcfg*.xml is copied as well. HASS.io automatically makes any USB Zwave sticks available to home assistant, persistently. Make sure your USB device path is the same as your old setup (eg. /dev/ttyACM0). Your Z-wave devices and configurations should migrate without issues. You may want to check this thread if you have any issues with Zwave. Just make sure your previous instance is stopped.
Finally, start HASSio supervisor back up:
sudo systemctl start hassio-supervisor.service
Uninstalling HASS.io on Docker
What if something goes wrong and you want to uninstall HASS.io. This is quite annoying because of the HASS.io supervisor which keeps starting Home Assistant and its addons. Here is how I uninstalled home assistant during my testing:
First, stop HASS.io supervisor.
sudo systemctl stop hassio-supervisor.service
sudo systemctl disable hassio-supervisor.service
sudo systemctl disable hassio-apparmor.service
sudo systemctl daemon-reload
Then execute the following commands:
sudo su
cd /etc/systemd/system
rm hassio-*
Now you can remove HASSio supervisor, home assistant, and addons using Portainer (if you have it running on Docker (I do) but not as an Home Assistant Addon) or using docker container rm command and the names of the containers. [Read: How to add an animated Weather Radar on Home Assistant?]
HASS.io on Ubuntu Server / Debian using Docker - Final Thoughts
Whether you use Home Assistant or HASS.io is your call. I am liking my move from Home Assistant to HASS.io on Docker. However, it certainly was not an easy move. I am pretty comfortable with Docker and Docker compose and I was cruising on my previous set up. To not able to manage HASS.io containers in the way I was used to previously was a bit confusing until I learned and tweaked my methods. I also have Portainer running in a separate container and not as HASS.io addon. Now, I use portainer to control HASS.io and its addons, although this is rarely needed. Furthermore, this was only a problem due to my move from old Home Assistant instance to HASS.io, while having both running during the transition. If you are just getting started, it will be very simple.
My HASS.io setup on Intel NUC with NVMe SSD is blazing fast even with numerous components and sensors, compared to my previous setup. The HASS.io community is constantly coming up with innovative addons to simplify or enhance home assistant. Therefore, if you haven't considered moving to HASS.io, maybe you will consider it after reading this post. Otherwise, I hope this post helped you install HASS.io on docker and harness the full power of your existing system.


![8 Amazing Raspberry Pi Ideas [2022]: Beginners and Enthusiasts Raspberry Pi ideas](https://www.smarthomebeginner.com/images/2021/09/raspberry-pi-4-dev-board.jpg)
