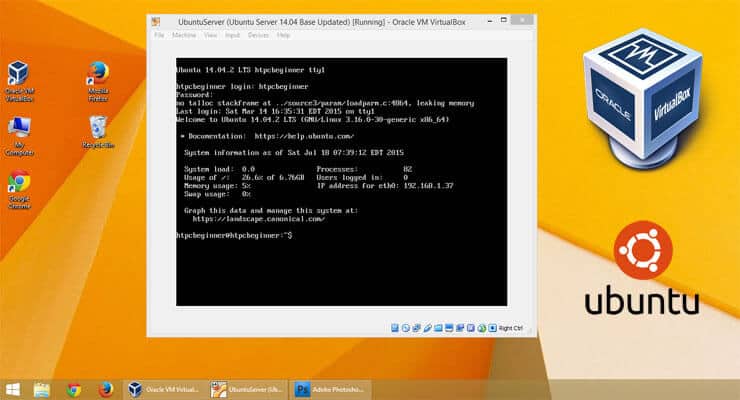
Don't have an extra PC laying around, no problem, just run a Ubuntu home server on VirtualBox VM. I have been pumping out VirtualBox tutorials over the last two months. Some have asked me if VirtualBox is somehow related to HTPCs. This post will answer that question. This post is the climax for the whole story. If you have one Windows, Linux, or Mac system and want to run a home server on laptop (or desktop) without making changes to the existing operating system, then read on.
Table of Contents
Run a Ubuntu Home Server on VirtualBox
While this post shows how to run a Ubuntu home server on VirtualBox, you may also choose to use other operating systems for your server. Laptops consume much less power than desktops and these days, multi-core laptops with 8GB or more RAM is very common. One TB or more hard drives are also becoming common. While many may consider 1 TB to be not enough for a home server, it is more than enough to run apps such as SickBeard, SickRage, Sonarr, or CouchPotato and stream latest TV shows and movies to network streaming clients around the house.
Best Android TV Boxes:
- NVIDIA SHIELD TV Pro Home Media Server - $199.99
- Amazon Fire TV Streaming Media Player - $89.99
- WeTek Play 2 Hybrid Media Center - $134.00
- Kukele Octacore Android TV Box - $179.99
- U2C Android TV Box - $95.99
While there are numerous uses for a home server, a basic Linux server on VirtualBox with PVR apps for automatic content download and NFS server or SAMBA server for file serving may just be enough to meet your local streaming needs. [Read: A budget HTPC-NAS Combo with an old PC and OpenELEC]
Setup Home Server on VirtualBox
First step is to setup Ubuntu Server on VirtualBox. The steps required to run Ubuntu home server on VirtualBox have be already been covered extensively. Follow the posts listed below get your Linux server on VirtualBox up and running.
- Install Virtual Box - Windows / Ubuntu host system
- Install Ubuntu Server on VirtualBox
- Install Guest Additions - Windows / Ubuntu guests
- Update Guest Additions - Windows / Ubuntu guest (if you already have VBox Guest Additions installed)
- Install Extension Pack on VirtualBox
You could also choose to run one of the many home server operating systems such as Amahi, OpenMediaVault, or FreeNAS as your VirtualBox guest OS.
If the available space on your laptop will be sufficient for your needs then you can move on to the next step. But if the space is not enough, which would normally be the case if you want to maintain an extensive media library, you can add additional home server space using an external USB Drive. Follow my previous post on how to access USB Drive on VirtualBox guest OS to additional storage space for your VirtualBox home server.
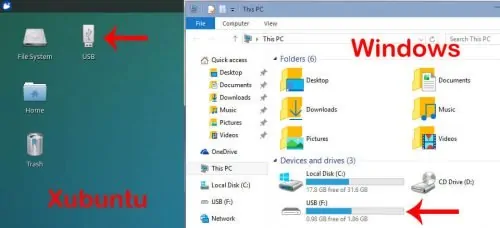
If you plan to use an external USB drive for storage, then I strongly recommend installing VirtualBox extension pack. With VirtualBox 5.0 you can even add USB 3.0 support to your VirtualBox Linux Server.
This is an optional step needed only if you want to be able to share folders between your host operating system on laptop and your guest home server OS. Follow my recently published post to share folders on VirtualBox. If you are using an external USB storage, you may want to share that dive as well.
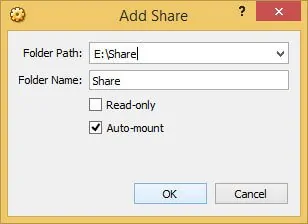
Once a VirtualBox shared folder is setup, mount the shared folder on Ubuntu Server guest OS. If for whatever reason you chose to install Windows for your Server OS, then mount the shared folder on Windows guest. Running Windows for server on Virtual Machine is not recommended due to resource requirements.
Setup Home Server Apps
The next step is get your home server apps up and running. Choose from SickBeard, SickRage, and Sonarr for automatic TV Shows downloading. Install CouchPotato for movie downloading. In addition, you will also need a torrent downloader and Usenet downloader. We recommend qBittorrent or Transmission bittorrent client and SABnzbd for Usenet. [Read: What is Usenet and why is it better than Torrents?]
We have several guides published to install the above software. Alternatively, you can automate the installation and maintenance of these software using our famous AtoMiC ToolKit.
Looking for an automated solution? Try our AtoMiC ToolKit, which makes installation and management of Home Server software such as SickBeard, CouchPotato, Torrent clients, etc. easy.
In addition, you will also need to install a file server. For Kodi streaming clients, setting up NFS server may reduce stuttering issues. If you plan on using a shared media Library for Kodi using MySQL, you will also need to setup MySQL server on Ubuntu guest OS. You may even go one step further and setup a Web Server on VirtualBox but that is beyond the scope of this post.
Bridge Network Adapter
Now that your Ubuntu home server on VirtualBox is up and running, it is time to make it available on your local network (or even from the internet). This is accomplished by bridging the network adapter in VirtualBox network settings for the Ubuntu Server VM.
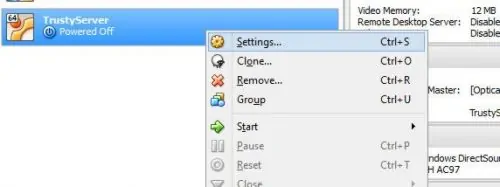
Go to Settings for your VM and then to "Network" settings. Under "Adapter 1" choose "Bridged Adapter" for "Attached To" and the network adapter you are currently using for "Name". In the example below, I am using my Gigabit Ethernet port.
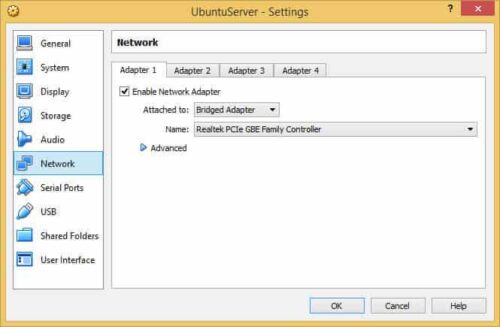
Once bridging is enabled, the IP address for your Ubuntu Home Server VM will be set by your router or DHCP server. Your virtual Home Server should now appear as a separate system on your network and should be available to all network clients. You can even setup port forwarding on your router and point various services to your Linux Home Server on VirtualBox. So there you go. Run Ubuntu home server on VirtualBox and setup your existing or old laptop as Server.

