Welcome everybody to the Kodi Beginners Guide Part 3: Add media sources to Kodi! In Part 1: What is Kodi, we went through the origins of Kodi and in Part 2: How to use Kodi we covered the installation and how to organize your media files. In this third part I'll show you how to add media sources to Kodi and how to setup Kodi library. If you're having trouble getting started just take a look on how to setup Kodi on Windows to help you on your way.
Table of Contents
How do you add media sources to Kodi?
In creating this Kodi setup guide I'm navigating through Kodi with a wireless Mouse and keyboard.
But if you own a smartphone or tablet running Android, I'd also recommend using either the offical remote app Kore or the Yatse remote app from Tolriq. [Read: Yatse vs Kore: a comparison to help you decide]
Best Wireless HTPC and Android TV Box Keyboards:
- Logitech K410 Living-Room Wireless Keyboard with Built-In Touchpad - $37.75
- Logitech Illuminated K830 HTPC Wireless Keyboard and Touchpad - $69.99
- iPazzPort KP-810-10AS Wireless Mini Keyboard Remote with Touch - $15.99
- Rii i8+ 2.4GHz Mini Wireless Keyboard with Touchpad - $22
- LYNEC C120Pro Mini Wireless Gyro Remote Keyboard Mouse - $13
Adding media sources to Kodi
Now, before we can add media to Kodi we have to know where and how our data is stored. It could be something as simple as a USB drive, a NAS (Network Attached Storage) device or you could go for something more advanced like making your own budget HTPC/NAS Combo. Directly connected drives like USB or internal drives should be recognized automatically by Kodi. However, if you have a NAS installed, like I do, you have to add it in Kodi as an SMB share. [Read: 5 Most common NAS or Home Server uses]
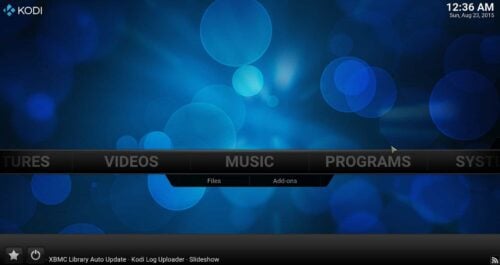
We will start the process by clicking on "Videos" and then "Files" to see this screen:

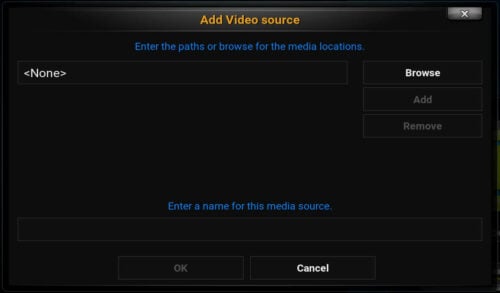
I find that all basic actions feel very intuitive in Kodi, like in this case, where you can only click on "Add Videos" in the following Kodi source install dialog, to go forward:
Add Network Location
Clicking on browse will open up the Kodi browser. Here you can see all the type of shares that are supported to setup Kodi library. Notice that there isn't a network location configured at this time:
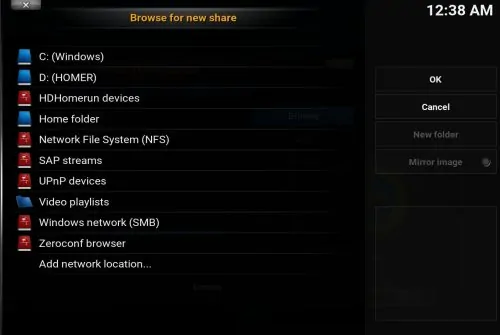
So, to add our NAS device to the available shares we go to "Add network location".
Adding network location brings up yet another popup menu where you need to fill in the network settings:
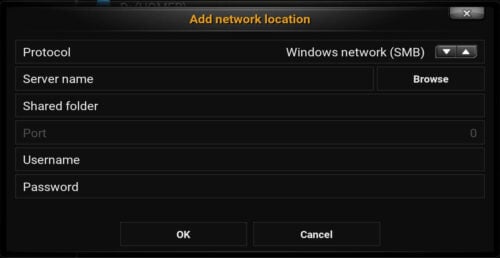
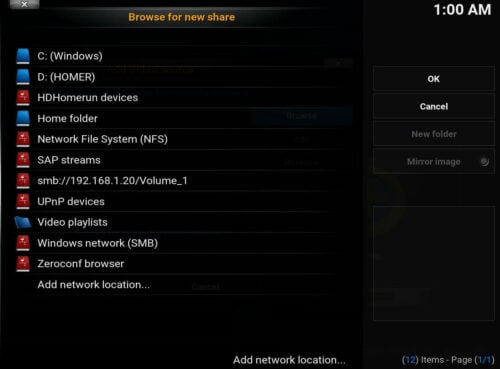
Fill in all required settings accordingly (Server name could be the NAS device name or its IP address) and select a folder you want to add. Then enter your Username and Password and click OK. If everything is in order, you should come back to the Kodi file browser and see your SMB share amongst all the others like this:
Add Library Folder
Next up to add media sources to Kodi is selecting the actual folder you want to setup Kodi library with:
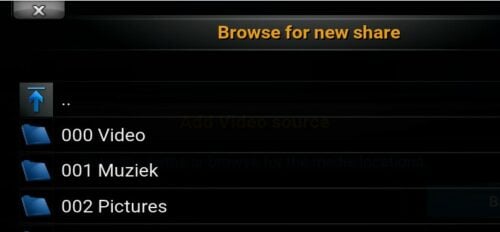
Remember the scrapers from part 2? It's important to know that when you add media sources to Kodi it can have multiple media locations, but you can only define one type of media scraper to this source. Therefore make sure they have the same type of content, be it Movies, TV Series or Music Videos when you add Kodi media sources:
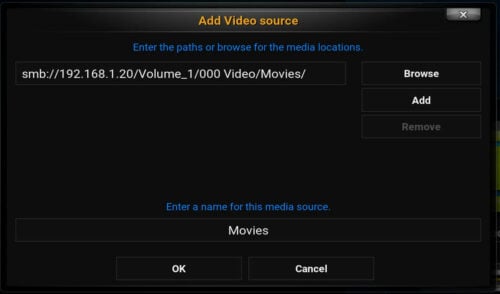
In this case, to add media sources to Kodi I created a folder called "Movies" and Kodi cleverly advised to name the media source, you guessed it, "Movies". So, it will not be a big secret if I tell you that the content type for this source will be...wait for it... movies. But you still need to select it manually in the following menu:
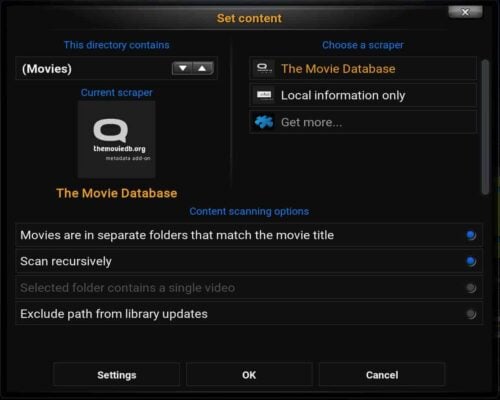
To setup Kodi library correctly you have to take good care of the content menus. First you choose the content type by clicking the arrows on the top left (In this example: Movies). Then you select your desired scraper on the top right. As I mentioned before, The Movie Database is the default Movie scraper for Kodi. By clicking on "Get more" you can add several others that may work better, depending on your specific type of content. I found that the TMDB works pretty good for me when I add media sources to Kodi.
If you have all your movies in separate folder, which I have advised you to do, you have to activate that scanning option. If everything seems in order, click OK.
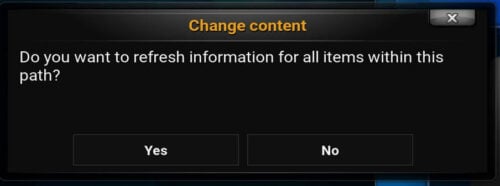
The moment of truth! It will ask you to refresh all information... which means it will do it's first scan of your movie folder and setup Kodi library. You should be seeing movie titles passing by. Next we can add Kodi media source for our TV Series folder:
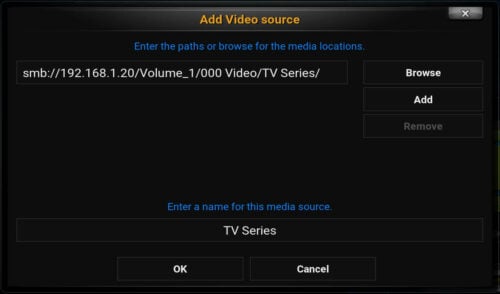
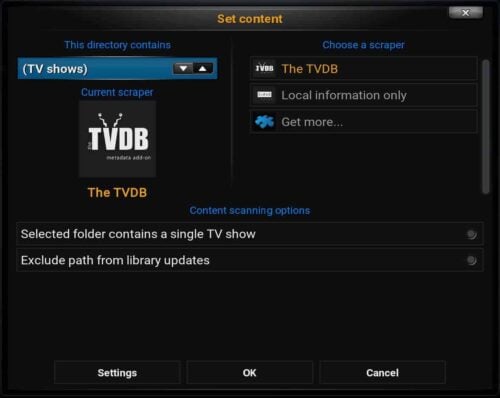
Same like with the Movies, except a different location and set content settings. The default scraper for TV shows in Kodi is the TVBD and it's got a massive database:
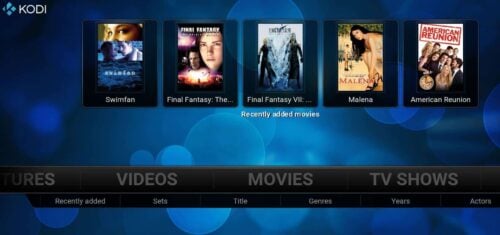
After the scan is completed, depending on your media collection, the result should look somewhat like this:
Adding Kodi Media Sources - Final Thought
So, that's how you can add media sources to Kodi and setup Kodi library by using scrapers. In the same manner you can also add music and pictures. For more detailed information, you can also check out the Kodi quick start guide on the Kodi website.
If you want to setup multiple HTPC devices with Kodi your can think about sharing the same Kodi library setup with all devices. One way to do this is by setting up your own MySQL server to get the best Kodi media player experience.
Starting with Kodi? Read these Kodi Beginner guides!
- Kodi Beginners Guide Series: Part 1 (What is Kodi?), Part 2 (Kodi Usage), Part 3 (Adding Media), Part 4 (Changing Appearance), and Part 5 (Folder Structure).
- Understanding Kodi Settings: Audio and Video
- Beginner Blueprint: Complete Kodi Setup Guide.
- Beginner Blueprint: Complete Amazon Fire TV Kodi Guide.
And with that, I’m closing out part 3 of the beginners guide for Kodi: Add media sources to Kodi. Look out for Part 4 which will be all about changing Kodi skins.

![15 Best Jellyfin Plugins [2023] - Supercharge your Media Server Jellyfin Intros Plugin Preview Pre-Roll](https://www.smarthomebeginner.com/images/2022/08/jellyfin-intros-preroll-preview.jpg)
![8 Amazing Raspberry Pi Ideas [2022]: Beginners and Enthusiasts Raspberry Pi ideas](https://www.smarthomebeginner.com/images/2021/09/raspberry-pi-4-dev-board.jpg)
![15 Best Plex Alternatives [2022] - FREE and BETTER Options Best Plex Alternatives feature image](https://www.smarthomebeginner.com/images/2022/08/best-plex-alternatives-feature-image.gif)
