While some people love Plex, because it streams your Movies, TV Shows and Music on your devices, that does not mean that it's for everybody. In fact, there are over 10 media streaming apps to pick from. In our previous article we talked about how you can install Subsonic on Ubuntu. Madsonic, a fork of Subsonic, can also stream your media just like Plex, and today I will show you how to install Madsonic on Ubuntu then setup Madsonic on Ubuntu to get you started.
Table of Contents
What is Madsonic?
Madsonic is a web-based media library and media streamer with jukebox functionality that allows you to stream your media to any compatible device. It is based on Java, so Madsonic runs on most platforms like Windows, MacOS and Linux.
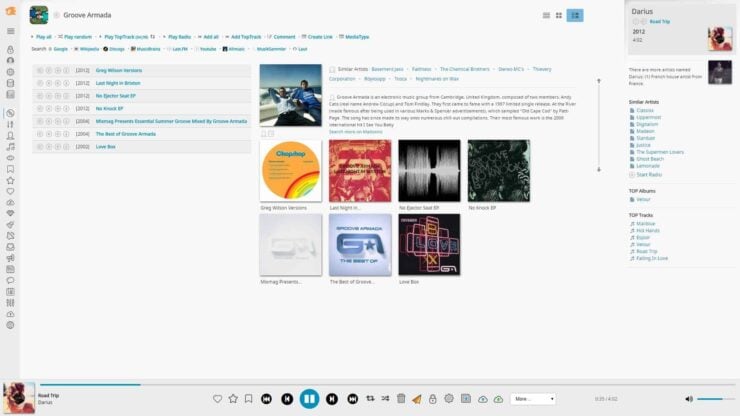
It is really easy to use, allowing you to enjoy your music, movies and photos no matter where you are. After you get past the setup, you will have a full-fledged server ready to serve your content. It has Sonos, Chromecast and Dreambox support, making it compatible with a wide range of devices. There is a demo site available which you can try in order to check it's functionality before installing. You can enjoy Madsonic on the go by using the official Madsonic Media Streamer Pro app for Android. If you don't want to pay for the official app, you can use the compatible apps listed on their website.
You can read the full list of features that will confirm Madsonic as one the best Media server software options. So let's get right at it and install Madsonic on Ubuntu.
Recommended HTPC / Home Server Builds:
- Best Home Theater PC Build 2017 to do it all (Plex, Kodi, NAS, Gaming)
- Best Emby Server builds 2018 – Pre-built and DIY options
- Medium Budget 4K HTPC Build 2017 for Kodi, Plex and Gaming
- Cheap 4K HTPC Build for Kodi, OpenELEC, and LibreELEC 2017
- Low Power Home Server Build 2017 for Network File and Media Storage
- Best HTPC for Kodi with 4K on a Medium Budget 2017 (~$400)
- Energy efficient budget HTPC-NAS combo build 2016
How to Install Madsonic on Ubuntu?
Installing Madsonic on Ubuntu is easy. But before we do that, make sure you have a working Ubuntu installation. If you need to learn how to install Ubuntu, follow our screenshot guide on how to Install Ubuntu Server 16.04 LTS Xenial Xerus.
First we need to install Java by running the following three commands in sequence:
sudo add-apt-repository ppa:openjdk-r/ppa
sudo apt-get update
sudo apt-get install openjdk-7-jdk
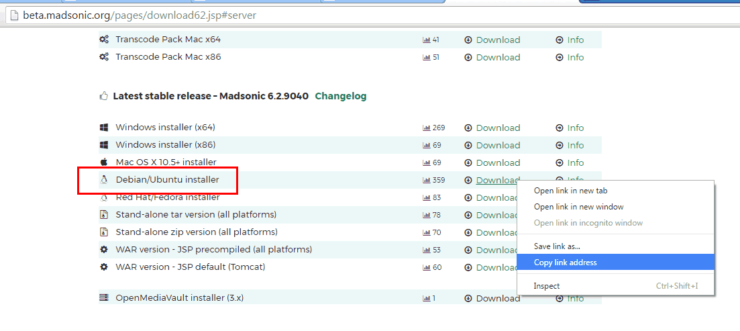
Next, we need to download the Ubuntu Madsonic installation package. Visit Madsonic download page, find the build for Ubuntu/Debian, right-click on the download link, and copy the link address as shown in the image below:
Then on Ubuntu terminal, type wget and paste the Madsonic download URL (copied in the above step) as shown below:
wget http://www.madsonic.org/download/6.2/20161208_madsonic-6.2.9040.deb
Once downloaded, install the downloaded Madsonic package for Ubuntu by running the following command:
sudo dpkg -i 20161208_madsonic-6.2.9040.deb
In a few minutes Madsonic will be installed and it will be available in the browser on http://yourserverip:4040. In my case, Madsonic is available on http://192.168.0.240:4040, where 192.168.0.240 is the IP address of my madsonic server.
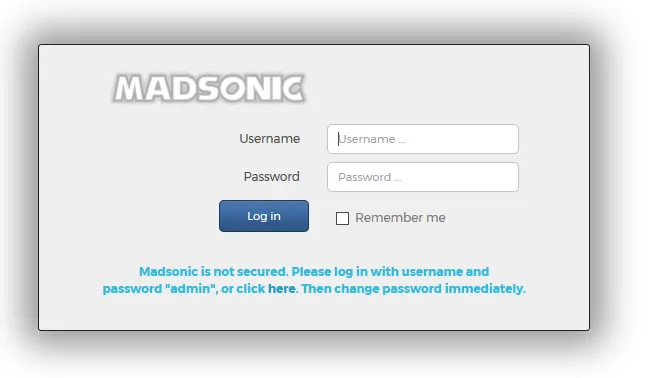
You can use the default user admin and password admin to log in the first time. Let's get to the next part of our article where you can learn how to setup Madsonic on Ubuntu.
Best Streaming Apps and Addons:
How to Setup Madsonic on Ubuntu?
After the first login, you will be greeted by the Getting started page where you can access the basic settings to setup Madsonic on Ubuntu. This section allows you to change your password, setup the media folders, and configure the network settings.
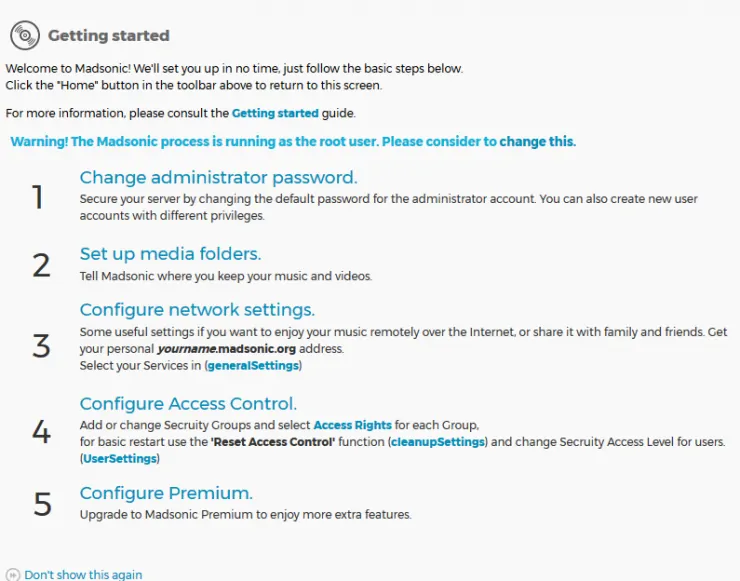
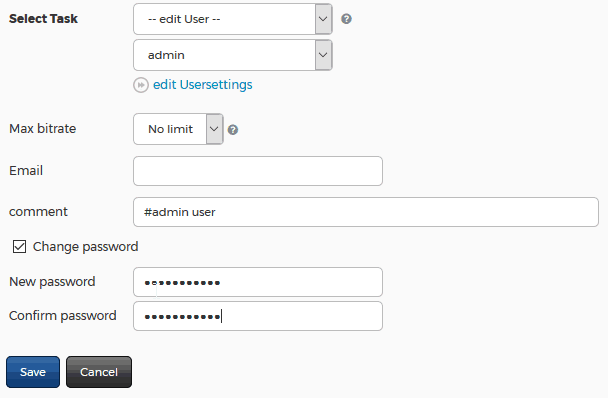
By clicking on the Change administrator password link you will be taken to the Users section where you can change your password. Make sure you choose a strong password for your admin account, then click on save.
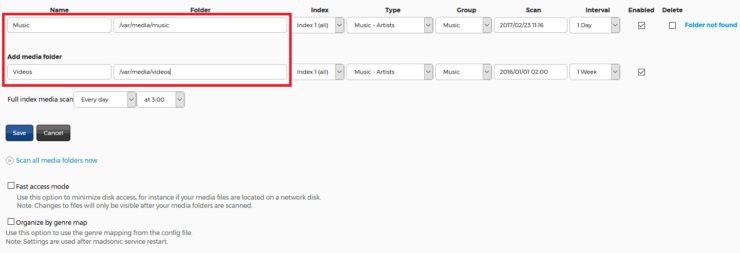
The Set up media folders link will take you to the Media folders section where you need to configure the location for your media. On the Name column, you can enter the type of media for the folder you want to use, and on the Folder column, enter the location for the media folder. I configured the location for my music folder and for my videos folder to be on /var/media/music and /var/media/movies, respectively. On the same page, you can configure the time when the folders should be scanned for media.
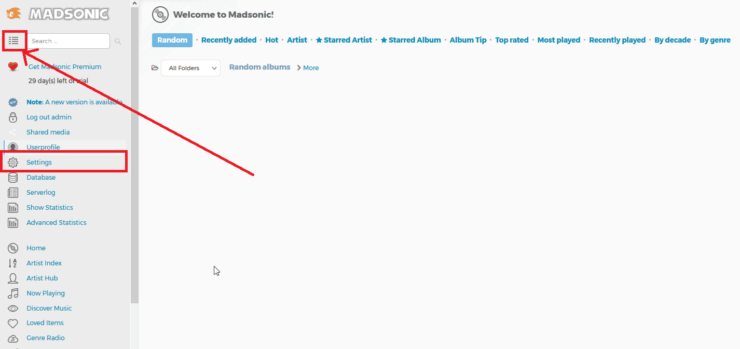
You can access the full suite of settings by going to the Settings page from the menu on left-top corner. These settings allow you to customize your Ubuntu Madsonic installation to your liking.
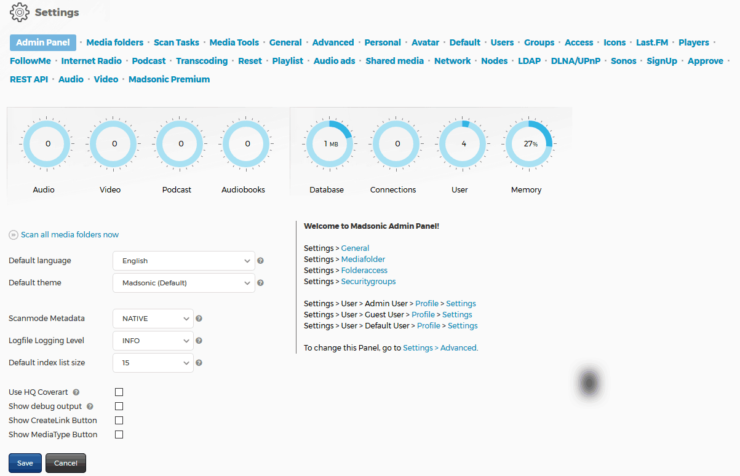
I recommend you to go through each section shown in the picture below, so you don't miss any features provided by Madsonic.
Ubuntu Madsonic Guide - Wrap Up
That is all there is to Ubuntu Madsonic media server installation. If you do not already have an automated system to download and organize media for Madsonic to stream, checkout our some of our guides: TV Show download with Sonarr and movie download with CouchPotato. Alternatively, check out all the automated media management apps we recommend for a home server or NAS. You can let our famous AtoMiC ToolKit do the hardwork of setting up your media management system. Sounds exciting? Go ahead install Madsonic on Ubuntu and enjoy streaming your content to all your devices.


![10 Best Plex Client Devices [2022] - STUTTER-free Streaming Best Plex Client Devices](https://www.smarthomebeginner.com/images/2022/02/best-nas-for-plex-server-featured-images-from-pexels-photography-maghradze-ph-3764958-e1648542743772.jpg)
![10 Best Jellyfin Client Devices [2022] - 4k, Hardware Transcoding, etc. Jellyfin Roku App](https://www.smarthomebeginner.com/images/2021/02/jellyfin-roku-client-app-ft.jpg)
![15 Best Jellyfin Plugins [2023] - Supercharge your Media Server Jellyfin Intros Plugin Preview Pre-Roll](https://www.smarthomebeginner.com/images/2022/08/jellyfin-intros-preroll-preview.jpg)
![15 Best Plex Alternatives [2022] - FREE and BETTER Options Best Plex Alternatives feature image](https://www.smarthomebeginner.com/images/2022/08/best-plex-alternatives-feature-image.gif)

![10 Best Emby Client Devices [2023] - 4k, Hardware Transcoding, etc. setup emby server with raspberry pi](https://www.smarthomebeginner.com/images/2017/02/setup-emby-server-with-raspberry-pi.jpg)